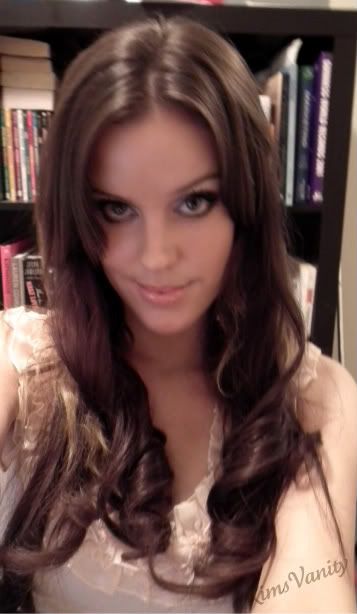
As previously mentioned, I said I would be dynig my hair extensions - well here is the finished look!
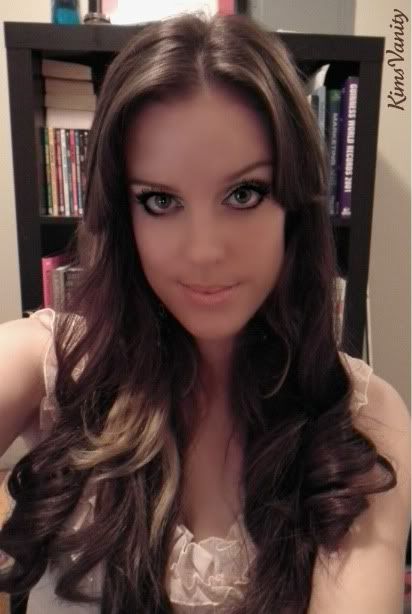
As you can see, I kept the ombre ends of my real hair to create some bottom hilights. From the pic it looks like they are only in a chunk on your left side, but the other side is just behind my head =)
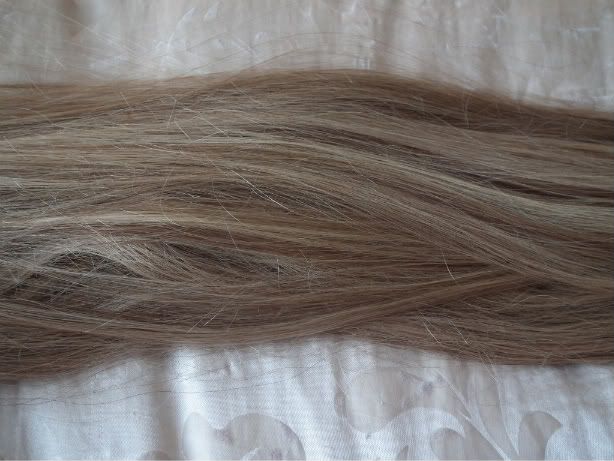
Here are the extensions before I dyed them:
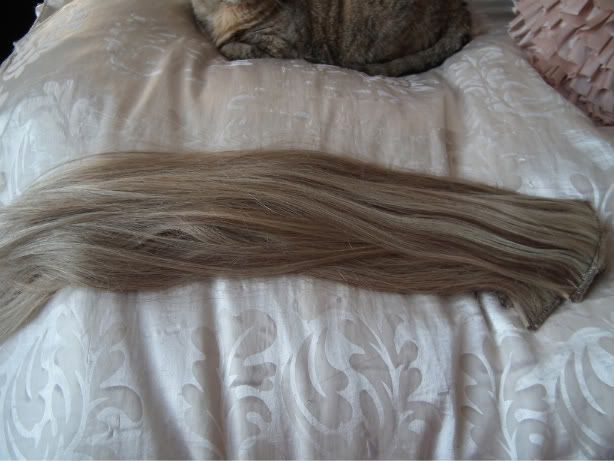
{Don't mind the cat at the top. She always wants to be near to the things I put on my bed. Laundry mostly, and in this case the hair extension. I think she thinks they are her new friends}
They were a really nice dirty blonde, with an assortment of highlights and low lights in them. There are four bands of clip in extensions above - two wide pieces for the back and partial sides, and two narrower strips for the sides. This human hair set cost me about $200 five years ago - I only wore them for special occasions, so I was able to keep them in good condition.
Here is what they looked like when I'd wear them with my blonde hair:
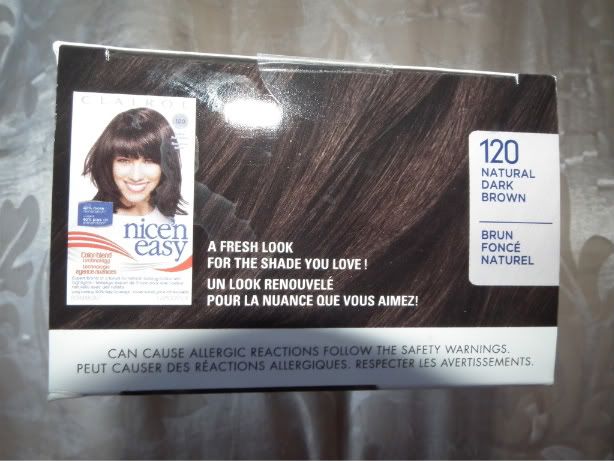
I've been brunette for over a year now, the longest I've stayed dark for as long as I can remember. I usually always miss being blonde, and end up going back, but I think I'm brunette for good this time. So I decided that until my hair grows long, I may as well dye my extensions dark for special occasions, too.
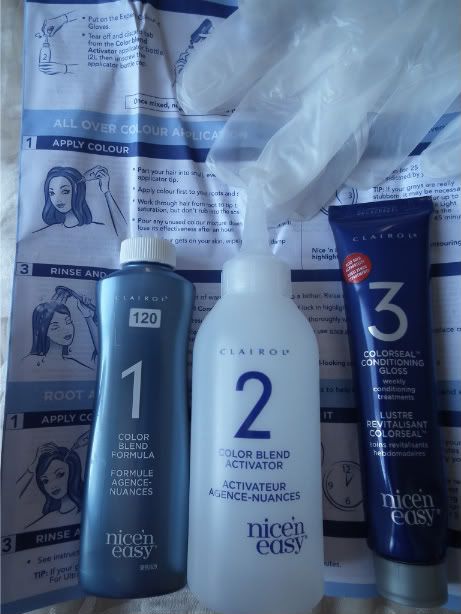
I used two boxes of the Clairol Nice 'n Easy in 120 Natural Dark Brown.
It seemed like the closest to my own natural hair color.
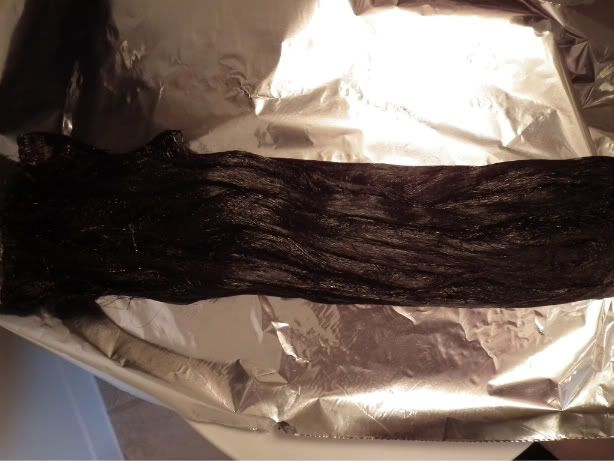
The dye was super easy to prepare.
After I'd mixed the color up, I laid the strips of extensions down one at a time in the bottom of the bath tub and applied the dye down the length of the extensions, making sure they were fully coated.
Once all four strips were saturated with dye, I laid them out on tin foil for 45 minutes to process.
Once they were done processing I ran them under the bathtub faucet one by one to rinse the dye out. Once they were rinsed, I applied the conditioning treatment that came with the dye and gently combed them through with a wide toothed comb. I then laid them on a towel to air dry. I never blow dry my extensions as it pulls out hair with each stroke of the brush/hands as you are drying.
It took about three hours for the extensions to fully dry.
I styled and curled my own hair as usual, then added in the extensions and curled them the same to blend in. They are just a fraction darker than my own dark hair, but over all I'm pleased with the result.
Tips:
-Make sure it's 100% human hair you're dying. It sounds creepy having someone else's hair on your head, I know, but synthetic hair won't change color, it will be ruined the minute it's wet and unable to be restyled.
-If you are purchasing extensions for the first time, try and get Italian hair extensions, as in, from an Italian head. They are expensive, but known to be the best, and easiest to work with.
-Lay tin foil down on the bottom of the bath tub while you are coloring the extensions so you don't get globs of staining dye all over the bottom of the tub.
-Try not to dye the hair more than a couple times (I won't dye mine again) as every dying will weaken the hair and cause more to fall out.
-When they start looking ratty - throw them out and get new ones! There's nothing worse than ratty hair extensions on a girl.
Let me know if you have any questions!


No comments:
Post a Comment